Showing posts with label DIY. Show all posts

Tuesday, August 16, 2016

Taco Tuesday!!

It's Tuesday and what goes best with Tuesday??
 
TACOS.
 
It's true!  They're the stuff dreams are made of.
 
If fact, they're so dreamy that one of the first meals I made for my hubby when we were dating was tacos.  With both of his parents being from Mexico and his affinity for authentic Mexican cuisine I KNEW he would be more than a little impressed with my mad south-of-the-border culinary skills.
 
Or so I thought.
 
Apparently, unbeknownst to me, the tacos I grew up eating (your classic ground beef, lettuce, cheese, sour cream, tomatoes, olives, etc.) were a little more 'American' than my mom (and that cute little Chihuahua) had led me to believe. 
 
I'll never forget the moment when I proudly presented my future husband with his taco dinner.  He looked at it, looked at me (trying to and failing at not grinning), looked back at the plate and then said, with brutal honesty -- ahem, loving support, those are not tacos. 
 
Say whaaaaaa?!?!
 
Yep.  It's true.  My tacos weren't actually authentic at all.  I was missing some major key ingredients. 
 
All of them.
 
Flour tortilla  Corn tortilla
Ground beef  Carne Asada, pork or chicken
Lettuce  Cabbage
Cheese  Cilantro
Olives  Salt
Sour Cream  Chile (aka homemade salsa)
Tomatoes  Lime juice
 
As much as I hate being wrong (although in this case I think it's fair to say I had been receiving years of misinformation, basically brainwashed), I have to admit that the 'tacos' I was making don't come close to the real thing. 
 
This one's for you babe. 
 
In writing.
 
I'll admit.
 
You were right.
(Were. This once. Simmer down).
 
Now onto the good stuff, a seriously delicious Taco Fiesta!  Kelly over at Studio DIY threw the most AMAZING Taco Piñata Workshop Party!  Just look at all these maravilloso images from her event!
 
This shot is everything.


LOVE El Pato, it's the real deal!  And using the can as a planter?!  Pure genius.


Just when you thought it couldn't get any better....
Tacos, crafting AND a swag bag!
#takeallmymoney
 
 
For more pics and all the details click here!
 
Ok amigos, that's all for now!  Happy (Taco) Tuesday!
 
Adios!
Jessica

Wednesday, March 23, 2016

Pancakes & Pajamas Birthday Party


Hello again!

If you're like us, you're enjoying spring break which means you're still in your jammies and eating leftover pizza for breakfast.  For reals.

I am finding time between slices to be slightly productive and managed to share these pics from the most recent birthday in our household.  The youngest member of the Hernandez crew turned 7 this month and we had a Pancake & Pajama Party to celebrate.

(Clearly we're VERY fond of staying in our jammies around here).


Here's the invite I designed.
I used Paperless Post this year, which was new for me.  Invitations are important to me because they set the tone for all the décor and I usually prefer mailing out an actual paper invite, but when I saw I could upload my design and get it to my guests without ever leaving my house (or getting out of my jammies....are you seeing a theme here) I was sold.


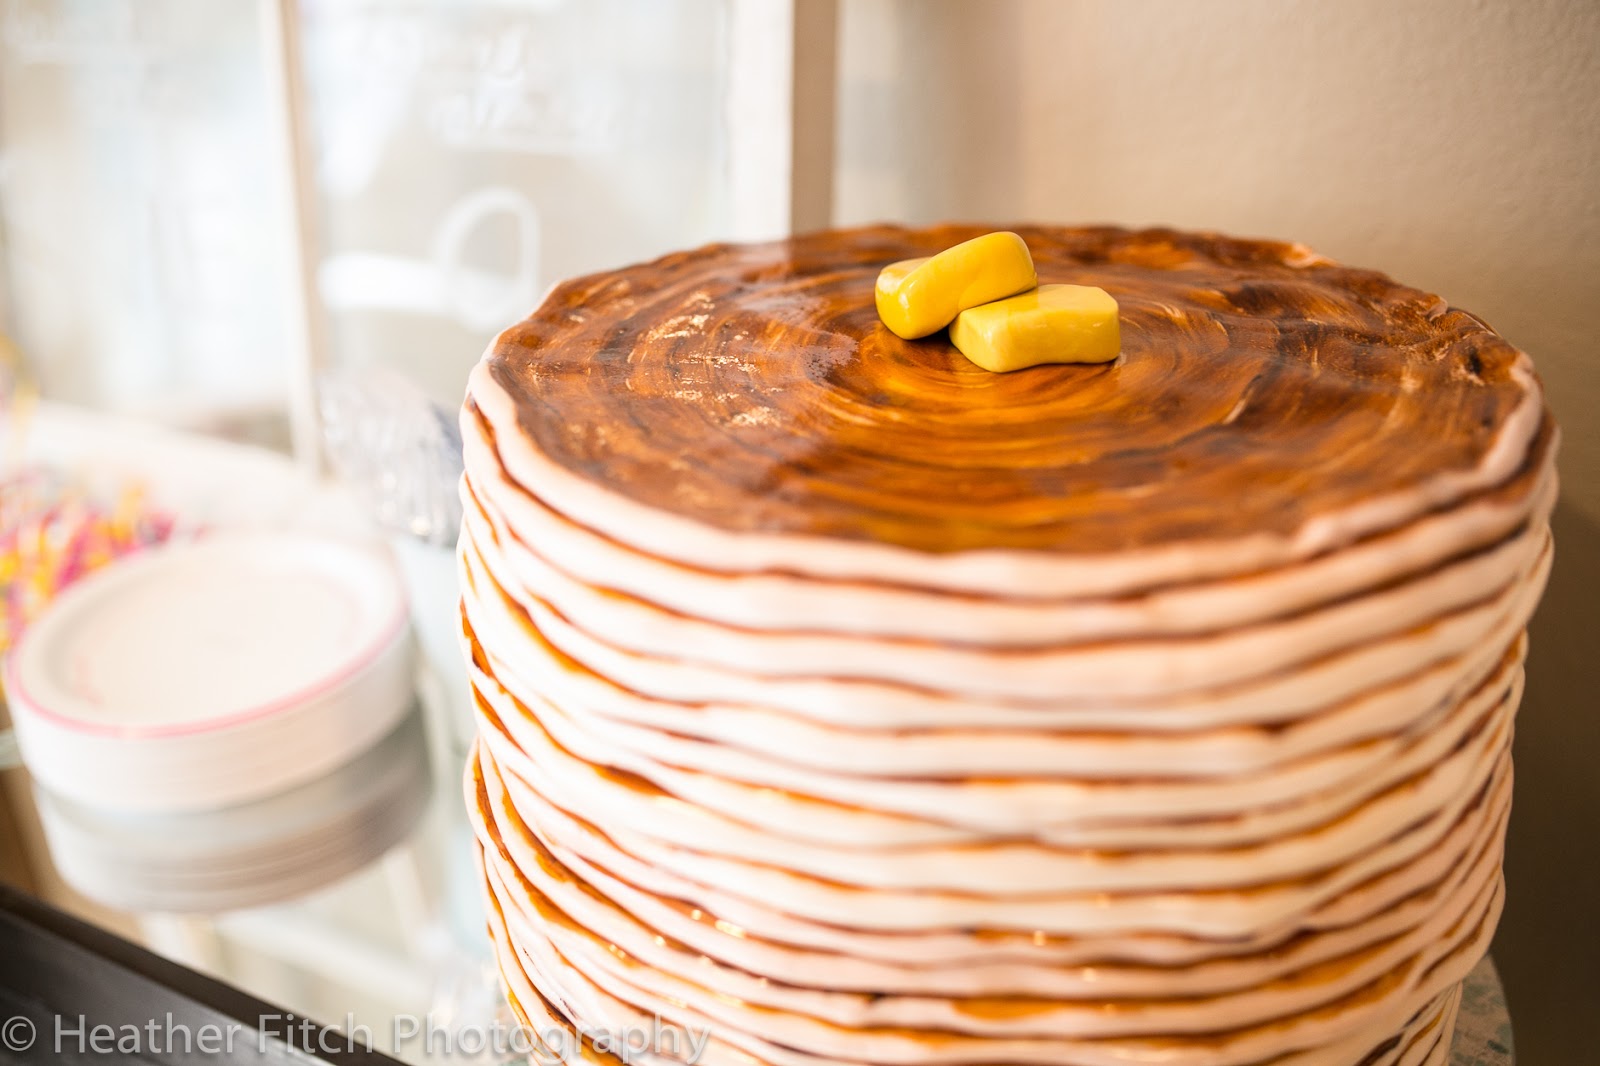
This cake.

Seriously.

It. Was. Huge.

We're talking 20 POUNDS of chocolatey goodness.  My brilliant baker of a mom made this masterpiece and it definitely stole the show.  All the kids (and parents) wanted to touch it and couldn't believe it was real.  Oh, and no big deal, but she hand painted it.  Yep, she's just that good.


There she is.  The birthday girl, wearing the jammies the inspired all the décor.


These tassel garlands are so inexpensive and easy to make.  Love that!!
(Sidenote: in hindsight I wish I would've ironed the tissue first....live and learn)


The sun was really bright and shining through the front window so it's a little hard to tell, but what you're looking at there is a 14 foot 'bed'.
In my living room.
For 16 crazy 7 year olds to sit at.
Did I mention I served the parents mimosas??


Here's a better shot of the 'bed' that I made. 


Per the birthday girl's request I kept the tabletop décor to a minimum.
"It's a bed, mom".
Yeah, yeah, yeah, whatever you say birthday girl.


I made the honeycomb ball tassel decorations too!  I followed the tutorial from Sweet Lulu Blog, it's super easy!  Thanks gals!


I made this bunting using 6 pictures of Bella, one from each of her past birthdays.  It was so bittersweet to see her growing up right before your eyes.


The spoon, fork and knife clothespins were a Michael's clearance find.  Whoop whoop!  They weren't the right color, but I fixed that is no time with a can of gold spray paint.


"Pancakes are basically cookies you eat in the morning".
Amen.


See that cute little Utensil Box??  Did you know I sell those on Etsy?!  Well the rumors are true, I do.  And you should go check my store Kelso Road!


Joe's Donuts.
I have an obsession.


I used a roll of craft paper to cover the counter and wrote on it to label all the food items.  It looked really cute and was super easy to clean up.  Win-win.


Pink lemonade and a DIY Iced Coffee bar.


I made these cute table overlays and the yarn pom poms for the corners.


How is she seven??
It's just not right.


This puts just how massive the cake was into perspective a little.  And also shows how the kids were finding it harder and harder not to touch it. ;)


Ladies and gentlemen, this is what happens at the end of a great party.
It's not good.
Someone take that knife away from me.

Seriously, though.  Everything went SO GOOD and we all had the best time!
Can't wait for next year!!

A GINORMOUS THANK YOU to Heather of Heather Fitch Photography for the superb photos, you rock girl!

Thanks for reading!
I hope you'll come follow me on Instagram and Facebook.
Have a fabulous rest of the week!


 :)  Jessica

Monday, November 3, 2014

Our Halloween Costume REVEAL!!

Happy Monday ya'll!
 
I hope everyone had a great Halloween weekend filled with family, friends,
trick-or-treating, parties and of course ..... CANDY!!
 
I'm not sure which I like more, seeing my girls all excited and dressed up or watching them handout candy to fellow trick-or-treaters.  They are totally into seeing all the other costumes and literally fight over who gets to handout the candy each time.  Gotta say, I love their enthusiasm :)
 
Like I shared in my last post, our costumes this year came together VERY last minute.
 
We're talking the day-of.  With coffee in hand, I was still putting together the finishing touches on Halloween morning.
 
In the end, I just love how they turned out!  It was so nice seeing them feel confident enough to go out looking totally and completely NERDY {and totally and completely adorable too}!
 
 
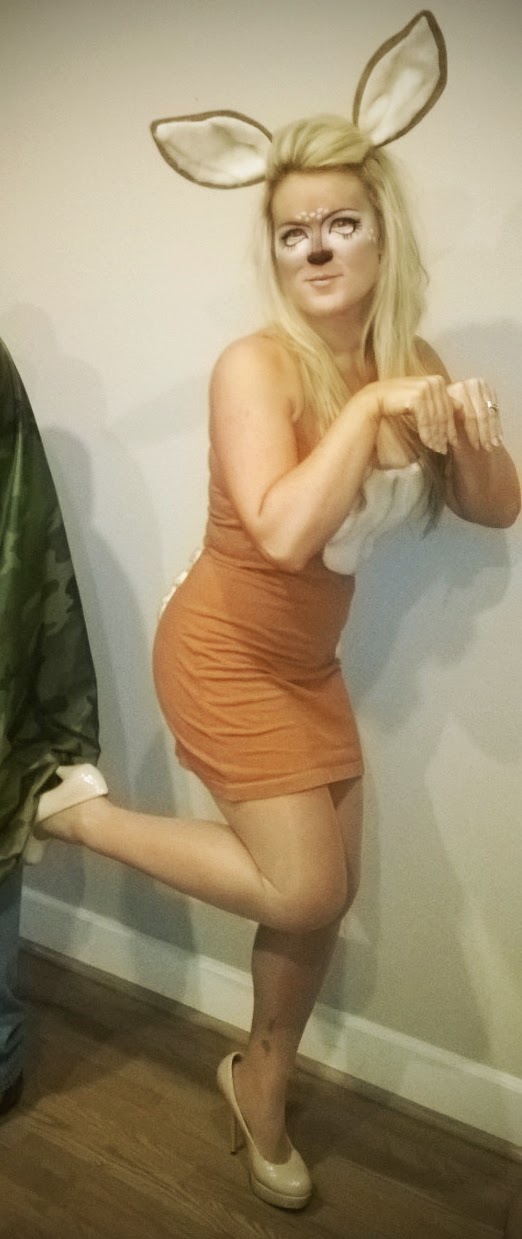
Before I get to our nerd costumes, I wanted to show you the quick and easy deer costume I put together for a Halloween party the hubs and I went to. 
 
What you'll need is a really big mens t-shirt.  Your size and height will determine what size t-shirt will work best.  I picked mine up at the local Goodwill for $3.49.  It was an XXLT which worked perfectly because it was long enough to be a dress without having to make any adjustments.   
 
Wash and dry your shirt then lay it out on a flat surface.  Next, take a dress you already own, a form fitting tank dress works best, and lay it on the t-shirt.  {If you don't have a tank dress you can use a tank top too}.  Now just trace the dress onto the t-shirt.  Here's what you should end up with.  Sorry about the lack of pics, I'm lucky I remembered to take even these two!
 
 
I pinned the shirt together to keep it from moving when I cut it.


I used Photoshop to darken my trace line so you can see it better.
 
Ok, now all you need to do is cut out the 'dress' on the trace line and then sew!  REMEMBER, depending on how much stretch your t-shirt has and how tight you want the finished dress to be, you may need to add a seam allowance.
 
And now, the finished product!!


I added some faux fur spots on the side and to the bust, and made some giant ears out of that same fur, some felt, a few pipe cleaners and a headband we already had.  The dress was SO EASY to make and came out perfect!  And it was super comfy!!
 
{I apologize for the blurry pic!!  That's what happens when you're running 30 minutes late, have to drop the littles at Grandmas and the only camera you remebered is the one on your phone.  Lame.}
 
 
No doe is complete without some spots on the booty and of course a tail! ;)


Here's the hunter and I :)


The make-up was super easy and I was able to do it with stuff I already had, that was a total bonus!


The total cost for this costume was less than $10!!


Alright, time to get nerdy!
 
After the girls FINALLY decided what they wanted to be for Halloween I went to my favorite local thrift shop.  Every Wednesday is 1/2 price day and I was able to pick up these plaid shirts for $2 each. 
 
 
I made some 'modifications' and ......
 
VOILA!
 
 
Totally nerdy plaid skirts!  We even managed to find the white shirts there on 1/2 price day too!  I made the bowties out of the shirts as well, and attached some DIY suspenders.  We picked up the tube socks at DollarTree and found the nerd glasses {with the exception of Miss B's real specs} in the dollar section at Target. 


No nerd is complete without their headgear!  I made the headgear out of a wire hanger, some elastic and some foam.  It was my favorite part of the costumes.  I think she looks so cute!  And she was beyond committed to staying 'in character'.  We took them out to dinner and she kept the headgear on the whole time!  That's my girl :)
 
 
The girls love it when I dress up with them, and let's be honest, it doesn't take much convincing :) , so I threw together a quick nerd outfit and off we went!  {Should I be concerned that it was so easy to find nerd attire in my own closet??}


Thanks so much for reading! I hope you enjoyed the costumes! 
 
Have a great day, and don't forget to follow my blog, pin the pics and like my Facebook page! 
 
Thanks a million!
 
Jessica